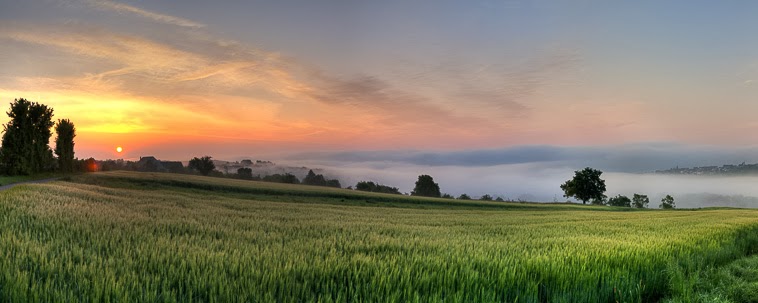
This morning was again a really nice sunset. I had some issues with the fast moving clouds, but i managed to take a panorama consisting of 4 rows in 3 lines and each photo consisted of 3 bracketed photos with 3 Stops up and down. The HDRs took about 10 to 12 sec. each photo. On a DSLR that should be much faster.
I managed to set the camera to M-Mode and the focus to manual and told the CaPiSche to start the panorama. I ended up with this picture:
This pic has 8552x6672 pixel resolution and 16 bit colordepth. Not bad for a nearly broken Canon SX200. (I had a crash with the cam and my Quadrocopter. It did fall from around 3-4 meters to concrete. Now the SX200 has no lenshood and i replaced it with some sugru).
The next thing will be timelapse. I already set up a python script to make a panning move in timelapse with ramping.
Thursday, November 7, 2013
Saturday, October 26, 2013
First time in the field
and missed to set up the camera right.
Last Wednesday we had again a very nice sunset. The fog was hanging low in the valley of the Neckar and the Sun just began to rise when i set up my capische and started a Panorama.
The Panorama-Program was set up to capture around 180° horizontally and about 90° vertically. Problem was, that i set up the Canon SX200 with CHDK to take 3 pictures but i missed to set it up to M Mode. Result was that i ended up with many Pictures, each 1st one well exposed, each 2nd one underexposed and each 3rd one overexposed. Problem is that the pictures shot directly into the sun are way much less exposed in the 1st ones than the ones that are taken from the ground or from the sky.
Mental Note: Use M-Mode, take 5 pics and measure the right exposure to something middle light.
So i can show you the HDR tonemapped pano i put together of the horizontal pictures.
This one s then some 20 MPixel. If the Pics of the below and above the horizontal pictures i would have become a 56 Megapixel picture out of a 12.1 MPixel Canon SX 200.
Tuesday, October 15, 2013
First Post
Starting my first english blog for the capische robot i designed and built.
CaPiSche stands for Camera Pi Scheduler.
It is not only a scheduler. It can move, turn and tilt the camera while recording or between 2 pictures. The CaPiSche once started as a ArduinoPhotoBot (german) in April 2011. The first goal was to create spheric panoramas in HDR. Later i realized that i also can use it for gigapixel panoramas and for timelapse-photography.
After reaching (mostly my) limits in programming a decent graphical menu to the arduino to select the different modes it can be used i switched to a Raspberry Pi as heart of the whole project. The trick is that i then can use simple file handling, write in python, use a standard lighttp-Webserver as userinterface and i can use basic PC hardware as interface. But the most usefull benefit of hardware-switch is that i can edit the program interactive on screen or by ssh-client.
Subscribe to:
Posts (Atom)


